Most of you are reading this tutorial because you are hosting a site or doing something else which involves access onto a web disk and you have no idea of what to do. But don’t fret! I will guide you through the process of uploading files onto that web disk.
Requirements:
FTP program (more about this later on)
Web Host
Some files you want to upload
This is fairly simple and there are not many necessary components to uploading via FTP. Let’s first begin with your options.
FTP Programs connects your computer to a network disk or drive in which you may upload files there. There are also a variety of FTP programs that you may use as well. If you have Dreamweaver they have a separate guide as to how to use their FTP.
The most commonly used and among the most popular is File Zilla. You can find it here: http://filezilla-project.org/ its open sourced and free as well. You can get it for all platforms and operating systems too. Download the File Zilla Client for all platforms. Run that and install it as you would for any other program. There is NO viruses at all if you download from http://filezilla-project.org/ and this statement can be authenticated by a few ten to hundred thousand people who use this tool.
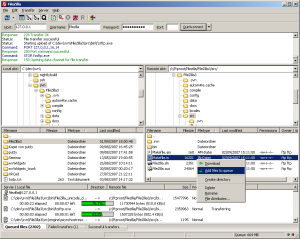
On the top of the File Zilla manager there is a text box for Host, Username, Password, and Port number. The host should be your site url. It does not include the http://www. part. Just the site and the .com part.
Sometimes webhosts specify a IP address, if that is the case then enter that set of number along with the dots into that area. The Username and Password should be provided by your webhost. The port number is usually 21 but in the case that you do not know, simply don’t enter it, because File Zilla will detect it automatically. Finally press quick connects and you are in.
In order to upload to a server, navigate to the correct folder in which you want the file to appear in and then navigate to where the file exists on your computer. The left navigation is by default your computer and the navigation on the right is your ftp server files. Right click on the file and press upload.
In some cases if you want to upload more than one file you may left click and drag a blue box across the files you want to upload and then right click them to upload.
Also remember that your webhost may specify a log out time after you have been idle for several minutes or so. This is a security measure and very important to protect against people who want to harm their servers. There are many other security measures such as only allowing you to upload around lets say 10 megabytes of data onto their server for around 5 minutes for one IP address at a time. Or in other cases they may specify that you can only upload a file that is less than the size of X megabytes. These are all security measures taken against hackers and users who want to abuse and crash their servers. You may ask your Web Master to change these settings so that you may upload a larger file. Otherwise there is no way to disable this, even using FTP programs. Any other methods would be deemed illegal.
As for other FTP programs the procedure may vary but they will always ask for the same details of Host, Username, and Password.

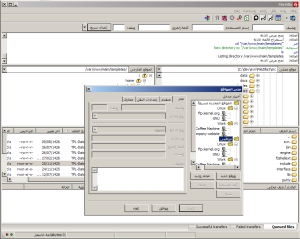
If your webhost has Cpanel installed onto it then that opens up many more alternatives as to uploading files. Cpanel comes with its own file manager and a nifty video tutorial of that. They also give you the option of accessing your web disk via your computer as if it was simply any folder on your computer. I have used this in the past and found it very fast and reliable. First click start, and then navigate to My Computer or Computer. (I am currently on a Vista Computer and it’s on the left hand side) On the top of network you should see a bar which says: “Map Network Drive†or something similar to that. Click it. There should be a popup. On the bottom it should say: “Connect to a website that you can use to store your documents and picturesâ€. Click that. Then choose a custom network location. This would be the FTP part. Hit next and then it should ask you for the location of that network. It gives you a few examples. Its usually, ftp://ftp.yoursite.com and that ought to work fine. Then it asks you if you want to log on with a username or anonymously. You MUST uncheck anonymous and type in your ftp username that was provided to you by your webhost. Finally when you open your new network folder it should prompt you for your password. Type in your password. You can save your password if you are going to access it frequently or it’s a private computer in which no one else has access to.
That is basically how to work a FTP program and upload files. You may tweak and set your ftp to your settings to make it connect automatically or so. However you must be warned that once a file is deleted, it cannot be recovered. This is not your ordinary desktop with the trash bin on it. Once deleted it’s gone. So usually first thing I do is create a back up of everything before I upload and delete.
